Your HVAC system is one of the largest mechanical investments in your home, and the decisions you make in your first weeks of ownership will affect your comfort and utility bills for years. Most homeowners don’t think about HVAC until something breaks, but the window before closing and moving in is the best time to inspect, test, and negotiate repairs before you’re locked into ownership. This guide walks you through what to check first so you can protect that investment.
New Home HVAC Inspection: Do This Before You Unpack
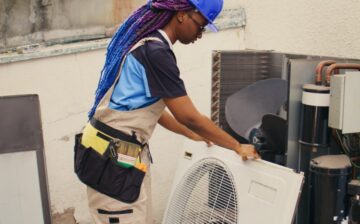
A new home HVAC inspection is one of the most important investments you can make before finalizing your purchase. Hire a specialist, not a generalist. Your general home inspector’s HVAC section often amounts to “it turned on.” Pay the extra $100-$150 for a licensed HVAC technician to do a standalone inspection and produce a written report. Ask for it in writing specifically, because verbal findings evaporate.
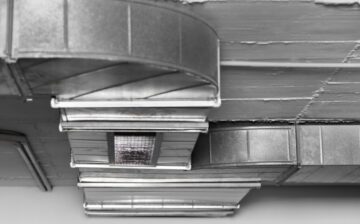
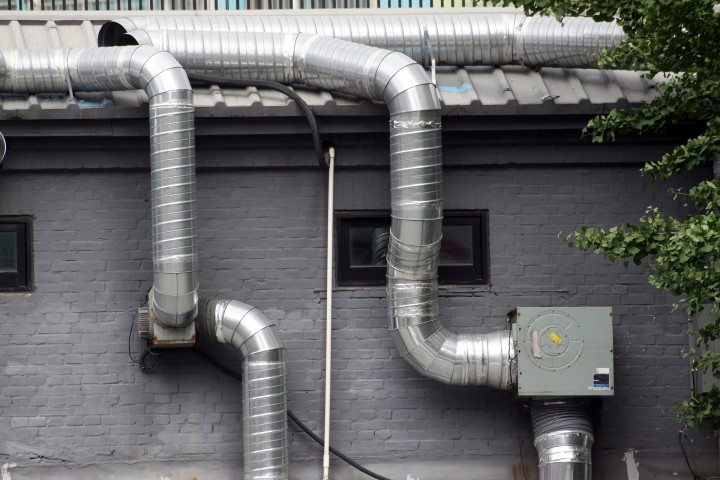
The inspection should cover the age and condition of the furnace, AC, and heat pump; heat exchanger integrity; flue and venting for blockages, corrosion, and proper slope; ductwork for leaks, disconnected sections, and mold; refrigerant charge; thermostat operation; filter condition; and CO/smoke detectors near all equipment.
If the system is 12 or more years old, budget for replacement within your first five years of ownership and plan accordingly. HVAC replacements run $5,000-$15,000+, so catching a failing system before closing can mean price renegotiation or seller-funded repairs. After closing, it’s entirely yours.
HVAC New Construction Checklist: New Build vs. Older Home
In an older home, the system has a track record. You can see what’s failed, what’s been repaired, and how it performs across seasons. In a new home, you’re the field test. Builders prioritize budget and schedule. The system that passed final inspection may be oversized, improperly balanced, or installed by a subcontractor who was rushed on their way to the next job.
New construction equipment is new but may not be properly commissioned. Airflow and refrigerant charge often need balancing after the fact. Ductwork was installed before drywall, so construction dust is inside it. Builder-grade equipment is frequently of minimum efficiency. Get the commissioning report from the builder, change the filter after the first 30-60 days, and verify that a Manual J load calculation was performed. Ask the builder for the actual document; if they can’t produce one, that’s telling.
Your new construction checklist should include testing airflow at every register in the house, checking for negative pressure issues like doors slamming on their own, confirming the refrigerant charge in writing, and registering all equipment warranties the week you close. Get all model and serial numbers before closing, as many warranties require registration within 60 days.
Common problems in new builds include oversized equipment that short-cycles, unbalanced duct distribution leaving some rooms cold and others hot, missing insulation on ductwork runs in unconditioned attics, drainage issues at the air handler, and thermostats placed in locations that give them a false reading of the home’s actual temperature.
Older homes present different challenges: equipment may be near or past its useful life, ductwork is often leaky or undersized, older refrigerant types like R-22 are phased out and expensive, and additions or remodels frequently create zone imbalances.
New Home HVAC Warranty: How to Find and Protect It
Most HVAC warranties are voided quietly, by missing registration deadlines, unlicensed service work, or using non-approved parts. The manufacturer doesn’t call to warn you. You simply discover, mid-repair, that you’re paying out of pocket for something that should have been covered.
Equipment warranties typically have two layers. The base parts warranty is usually included automatically. The extended warranty, often 10 years on parts, sometimes including a lifetime heat exchanger warranty, requires online registration within 30 to 90 days of installation. Miss that window, and you permanently lose years of coverage.
At closing or immediately after installation, find the model and serial numbers on the equipment tags. They’re typically on a sticker on the side of the furnace or air handler and on the outdoor condenser unit. Go directly to the manufacturer’s website and register each piece of equipment separately. Save the original installation invoice and photograph all equipment labels.
Create a home file, physical or digital, with copies of all warranty registrations, the installation date, the installing contractor’s contact information, and a log of any service visits. A clearly labeled photo album on your phone works perfectly well.
Always use licensed contractors for any service work, as many warranties explicitly require it. DIY refrigerant work can void equipment coverage entirely. Common warranty killers include skipping annual maintenance, adding refrigerant without fixing the underlying leak, and using non-approved parts or contractors.
New Home Heating System: How to Prepare for Cold Season
The worst time to discover your furnace doesn’t work is the first cold Tuesday in November, when every HVAC company in the city is booking two weeks out. The fix is simple: run your new home heating system for a full cycle in September, before you need it.
Before that first run, change the filter and check that all supply and return registers in the house are open and unblocked by furniture, rugs, or stored items. Visually inspect the flue pipe connection at the furnace to make sure it’s secure and nothing is blocking it. Test your carbon monoxide detectors and replace batteries while you’re at it. Know where your furnace switch and gas shutoff are located before you ever need them.
Turn the thermostat up, let the system run for 15 to 20 minutes, and verify that warm air is actually coming out of every register. The first time a furnace fires after months of sitting idle, it will often burn off accumulated dust and produce a brief smell. That’s normal and dissipates quickly. What isn’t normal: no ignition after a minute or two of trying, strange banging or metal-on-metal sounds during startup, or your carbon monoxide detector activating.
Understanding your system type matters. Forced-air furnaces heat air through ducts, so filter maintenance is critical. Heat pumps are efficient in mild cold but have backup electric strips for very cold weather; know that emergency heat works but can increase your electric bill if left engaged. Boiler and radiant systems heat water through radiators or floor loops, and mini-splits have no ducts, with each zone using its own air handler.
New Home Air Conditioning: What to Set Up Before Summer
AC systems don’t fail randomly. They fail because small maintenance items were skipped, and summer heat finally pushed a marginal capacitor or dirty coil over the edge. Prepare your new home air conditioning system in April or May, not June, before every HVAC company in your area is booked out.
Start with a new filter, then go outside to the condenser unit. Clear any plant growth within two feet on all sides; bushes, vines, and debris restrict airflow and make the unit work harder than it needs to. Check that the condenser is level, since compressors fail faster when tilted. Gently rinse the condenser coil fins with a garden hose from the top down. Never use a pressure washer; it bends the fins and causes more damage than it fixes.
Find the condensate drain, the PVC pipe near your air handler that removes moisture the system pulls from the air. Pour a cup of diluted white vinegar or bleach down it to confirm it flows freely and prevent algae clogs. A clogged drain can back up, damage drywall, or trigger a shutoff switch that kills the whole system.
Turn the system on and listen for rattling or grinding. Run a simple temperature split test: let it run for 15 minutes, then measure the temperature at a supply register and a return register. A properly functioning system should produce a 15 to 20 degree Fahrenheit difference. Under 12 degrees could indicate low refrigerant or a dirty coil. Ice on refrigerant lines means a low refrigerant charge or poor airflow. Water pooling near the indoor air handler means a clogged drain.
Common HVAC Upgrades After Moving Into a New House
The upgrade with the highest return for most homeowners is the simplest: a smart thermostat. For $100-$250 installed, you get scheduling, remote access, runtime analytics, and diagnostic data that used to require a service call. Ecobee and Nest are both solid; Ecobee’s remote room sensors are particularly useful in multi-story homes.
Duct sealing is often overlooked but delivers real results. If your home is more than 15 years old or some rooms stubbornly stay uncomfortable, have airflow tested first. Homes with 20 to 30 percent duct leakage can see real reductions in energy bills after professional sealing.
Upgrading to a MERV 11-13 filter improves air quality without strangling most systems; avoid MERV 16+ on standard residential equipment. In humid climates, a whole-home dehumidifier tied into the duct system lets you maintain 45-50% relative humidity without running AC constantly. If you have a room that’s always uncomfortable, a single-zone mini-split is often more cost-effective than trying to rebalance the whole duct system.
HVAC Tips for Homeowners: Maintenance Habits to Build From Day One
The homeowners who avoid emergency breakdowns mostly do four things on a schedule: they change filters consistently, run the system briefly before each season starts, keep the outdoor unit clear, and pay attention to energy bills as an early warning system.
Set a recurring reminder for every 60 to 90 days, depending on your household, with 1-inch filters replaced every 30-60 days and 4-5 inch media filters every 6-12 months. Use MERV 8 to 11 for most homes. Don’t go above MERV 13 unless your system was specifically designed for the higher resistance those filters create.
Before warm weather, replace the filter, rinse the condenser coil, test the AC, clear the condensate drain, and make sure the outdoor unit has at least two feet of clearance. Before cold weather, replace the filter again, run the furnace for a full cycle, check your carbon monoxide detector batteries, and inspect the flue pipe connection.
Once a year, compare your energy bills with the same months of the year before. A sudden 20 percent or more increase without a change in weather or habits is often the earliest sign of a system problem. Keep a maintenance log with dates, technician names, findings, and parts replaced.
Red Flags: When to Call a Pro vs. Handle It Yourself
The rule is straightforward: anything involving combustion, refrigerant, or active water damage is a professional call. Anything involving filters, cleaning, or settings is something you can handle yourself.
Call immediately, and leave the house if necessary, if your carbon monoxide detector activates near the furnace, if you smell gas near heating equipment, if a gas furnace has a yellow or orange flame instead of blue, if you see water dripping from the ceiling near the air handler, if you notice sparking or an electrical smell, or if you hear loud banging, screeching, or grinding.
Call within 24 to 48 hours if the system runs constantly but can’t reach the temperature you’ve set, if it’s short-cycling, or if you see ice forming on the indoor unit or on refrigerant lines. Handle yourself: filter replacement, clearing a slow condensate drain with diluted white vinegar or a wet/dry vac, adjusting register dampers, resetting a tripped circuit breaker once, clearing debris from around the outdoor condenser, cleaning condenser fins with a hose, and replacing thermostat batteries.
How to Find an HVAC Contractor You Can Trust
Good contractors are in demand and rarely need to advertise aggressively. The best leads come from neighbors, local community boards, and long-standing word of mouth, not from the company running the most Google ads or offering the lowest quote over the phone.
Before hiring anyone, ask whether they’re licensed and insured, whether their technicians are NATE-certified, and whether they pull permits for new equipment installations. Get a written estimate and ask for references from similar jobs in the past year.
The Manual J question is a reliable litmus test for replacement jobs. If you ask whether they will do a Manual J load calculation before recommending a replacement system size and the contractor dismisses the question, that’s a significant warning sign.
Warning signs to walk away from regardless of price: quotes given without visiting the home, pressure to decide the same day, recommending the largest available system because it’s “safer,” inability to explain findings in plain language, cash-only payment or no written invoice, unsolicited door-to-door contact, quotes far below every other bid, or wanting to start work without a written contract.
We hope you found this blog post on Moving Into a New Home. What to Do With Your HVAC First, useful. Be sure to check out our post on The 10 Overlooked Habits That Save You Big on HVAC Repairs for more great tips!

Have Experience in the Moving Industry? Want an Additional Income Stream? Work With All Around Moving!
Partner with All Around Moving Services Company, and we’ll help you make money in various ways. Click here to learn more about the program.