Moving into a new house is an exciting milestone, but it comes with a checklist of essential inspections to ensure your new home is in top condition. One of the most critical areas to check is the plumbing system. Overlooking potential plumbing issues can lead to costly repairs and major inconveniences down the line. To help you move into your new home with confidence, here are six plumbing areas you should thoroughly inspect before settling in.

1. Water Supply Lines
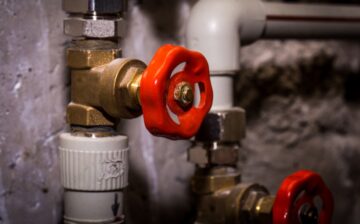
Water supply lines are the arteries of your home’s plumbing system, delivering fresh water to your taps, showers, and appliances. Start by checking the main water supply line for any signs of leaks, corrosion, or damage. It’s essential to locate the shut-off valve, typically found near the water meter or where the main line enters the house. Ensure the valve functions properly; a faulty shut-off valve can be a major issue during emergencies.
Inspect the visible supply lines for rust, drips, or wet spots, which indicate potential leaks. Pay close attention to connections under sinks and behind appliances like washing machines and dishwashers. Replacing old or damaged supply lines with newer, more durable materials such as PEX or copper can prevent future leaks and water damage.
Steps to Check Water Supply Lines
- Locate the Main Shut-Off Valve: Ensure it’s functioning correctly to avoid water damage in case of an emergency.
- Inspect Visible Lines: Look for any signs of leaks or corrosion.
- Check Connections: Focus on connections under sinks and behind appliances for any signs of leakage.
2. Drainage System
A well-functioning drainage system is crucial for removing wastewater from your home efficiently. We spoke to Cyber Plumbers and they mentioned that a blocked drain can lead to bigger plumbing issues such as pipe corrosion, burst pipes, and flooding.
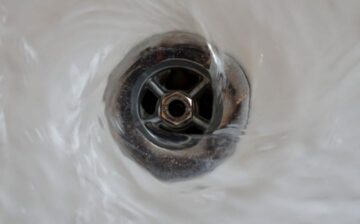
Begin by testing all sinks, baths, and showers to ensure they drain quickly and without any gurgling sounds, which can indicate clogs or ventilation issues. Slow drains often point to blockages in the pipes, while unpleasant odours can signal more serious sewer line problems.
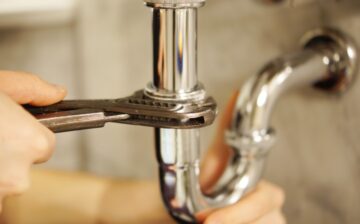
Check the condition of the visible drain pipes for any signs of leaks or corrosion. Look under sinks and around toilets for puddles or moisture, which can indicate a slow leak. If your new home has a basement or crawl space, inspect these areas for any signs of water accumulation or dampness, as this can indicate drainage issues that need to be addressed.
Steps to Check Drainage System
- Test Drains: Ensure all sinks, baths, and showers drain quickly.
- Listen for Gurgling Sounds: These can indicate clogs or ventilation issues.
- Inspect Pipes: Look for leaks or corrosion, particularly under sinks and around toilets.
3. Water Heater
The water heater is an essential component of your home’s plumbing system, providing hot water for showers, dishwashing, and laundry. Begin your inspection by checking the age and condition of the water heater. Most water heaters have a lifespan of 8-12 years, so if the unit is approaching this age, it may be time for a replacement.
Inspect the water heater for any signs of leaks, rust, or corrosion, particularly around the base and connections. Ensure the temperature and pressure relief valve is functioning correctly, as a faulty valve can lead to dangerous pressure build-up. Additionally, check the anode rod, a sacrificial rod that prevents tank corrosion, and replace it if it’s significantly corroded.
Steps to Check Water Heater
- Check Age and Condition: If the water heater is 8-12 years old, consider replacing it.
- Inspect for Leaks and Rust: Focus on the base and connections.
- Test Relief Valve: Ensure it’s functioning to prevent pressure build-up.
- Examine Anode Rod: Replace if significantly corroded.
4. Toilets
Toilets are frequently used fixtures in any home, making their proper function essential. Start by checking each toilet for leaks around the base, which can indicate a faulty wax seal. Flush each toilet to ensure it operates correctly and doesn’t run continuously, which can waste water and increase utility bills.
Inspect the condition of the toilet tank components, including the flapper, fill valve, and flush handle. These parts can wear out over time and cause flushing issues. Replacing worn-out components is a relatively simple and inexpensive fix that can prevent more significant problems in the future.
Steps to Check Toilets
- Check for Base Leaks: Look for any signs of water around the base.
- Flush Test: Ensure the toilet flushes correctly and doesn’t run continuously.
- Inspect Tank Components: Look at the flapper, fill valve, and flush handle for wear and tear.
5. Taps and Showerheads
Leaky taps and showerheads are not only annoying but can also waste a significant amount of water over time. Test all taps and showerheads in the house to ensure they operate smoothly without dripping when turned off. If you notice any leaks, it could be due to worn-out washers or seals, which are typically easy to replace.
Check for adequate water pressure from all taps and showerheads. Low water pressure can be a sign of mineral buildup in the aerators or more serious issues like pipe obstructions or leaks. Cleaning or replacing aerators can often resolve minor pressure problems, but persistent issues may require a professional assessment.
Steps to Check Taps and Showerheads
- Test for Leaks: Ensure taps and showerheads don’t drip when turned off.
- Check Water Pressure: Make sure the water pressure is adequate.
- Clean or Replace Aerators: This can resolve minor pressure issues.
6. Sump Pump
If your new home has a basement, it’s essential to check the sump pump, a critical device for preventing basement flooding. Locate the sump pump, typically found in a pit or basin in the basement floor, and ensure it is in good working condition. Pour a bucket of water into the sump pit to test the pump’s operation; it should activate and quickly pump out the water.
Inspect the sump pump for any signs of wear, damage, or electrical issues. If the pump is older or shows signs of malfunction, consider replacing it to avoid potential flooding. Additionally, ensure the sump pump has a battery backup system to keep it running during power outages, which are common during severe weather conditions.
Steps to Check Sump Pump
- Locate the Pump: Typically found in a pit in the basement.
- Test the Pump: Pour water into the pit to ensure it activates and pumps out water.
- Inspect for Damage: Look for wear or electrical issues.
- Check Battery Backup: Ensure it works to keep the pump running during power outages.
By thoroughly inspecting these six plumbing areas before moving into your new house, you can avoid unexpected plumbing emergencies and costly repairs. Ensuring your water supply lines, drainage system, water heater, toilets, taps, showerheads, and sump pump are all in good working order will give you peace of mind and help you settle into your new home smoothly. Remember, a little diligence now can save you a lot of trouble in the future.
We hope you found this blog post on 6 Plumbing Areas to Check Before Moving Into A New House, useful. Be sure to check out our post on Plumbing Strategies To Apply For a Sustainable Home for more great tips!
Have Experience in the Moving Industry? Want an Additional Income Stream? Work With All Around Moving!
Partner with us and join the Work With Us program. We will help you make money arranging professional moving services, by establishing your own moving consultant business operation. Click here to learn more.


