Packing a kitchen takes more time than packing most other rooms. You need to sort food, clean greasy appliances, protect fragile dishes, and decide what to keep available until moving day.
A clear system makes the job easier. Start by removing items you no longer need. Then clean each cupboard, appliance, and reusable container before packing it. Everything that enters a box should be clean, dry, protected, and clearly labelled.
This guide explains how to clean and pack your kitchen before a move without bringing grease, crumbs, odors, or unnecessary clutter into your new home.
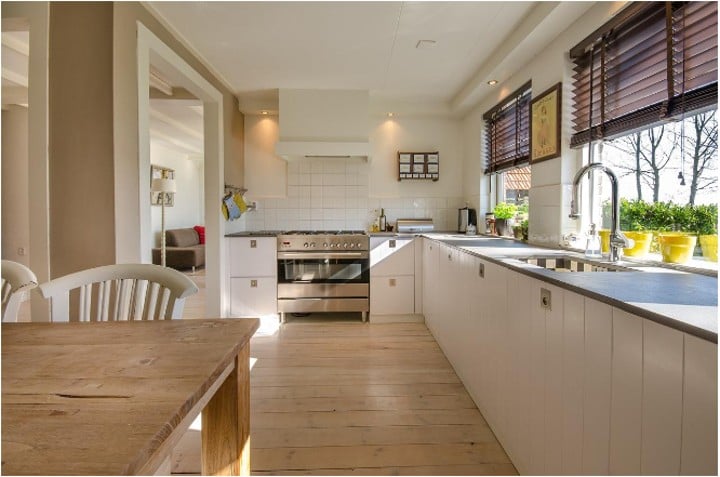
When Should You Start Packing Your Kitchen?
Start packing your kitchen one to two weeks before your move.
Begin with items you rarely use, including:
- Special serving dishes
- Baking equipment
- Extra glasses and mugs
- Seasonal cookware
- Duplicate utensils
- Small appliances you do not use every day
- Unopened pantry items
Leave everyday plates, cutlery, cookware, cleaning supplies, and coffee-making equipment until the final two days.
Use this simple schedule:
| Time before moving | What to do |
| 1–2 weeks | Declutter, use pantry food, and pack low-use items |
| 5–7 days | Pack extra dishes, bakeware, and small appliances |
| 2–3 days | Clean cupboards, wash containers, and prepare large appliances |
| Final day | Pack essentials, empty the refrigerator, and clean surfaces |
| Moving day | Pack the essentials box and complete a final inspection |
Starting early also gives you time to donate usable items rather than throwing them away.
Gather Your Kitchen Packing and Cleaning Supplies
Collect your supplies before emptying the first cupboard. This prevents you from stopping halfway through the job.
You may need:
- Small and medium moving boxes
- Heavy-duty dish boxes
- Packing paper
- Bubble wrap or padded sleeves
- Cardboard dividers
- Packing tape
- Permanent markers
- Zip-top bags
- Rubber bands
- Reusable cable ties
- Microfiber cloths
- Dish soap
- Mild degreasing cleaner
- Sponges
- A vacuum or handheld brush
- Trash and recycling bags
Moving is also a good opportunity to refresh your cleaning routine. Along with reusable cloths and biodegradable cleaners, keep a non-toxic hand soap at the sink so you can wash away grease, dust, and food residue while reducing unnecessary exposure to harsh chemicals.
Use small boxes for heavy items such as canned food, dishes, and cast-iron cookware. Large boxes can become too heavy to lift safely.
Keep several cleaning cloths, trash bags, paper towels, dish soap, and hand soap outside your packed boxes. You will need them during the final clean and when you arrive at your new home.
Step 1: Declutter Before You Clean and Pack
Moving is a good time to review what you actually use.
Empty one cupboard or drawer at a time. Divide the contents into four groups:
- Pack
- Donate
- Recycle
- Discard
Remove:
- Expired food
- Stale spices
- Chipped plates
- Cracked reusable containers
- Warped lids
- Broken utensils
- Duplicate gadgets
- Appliances you no longer use
- Open food that may leak during transport
Check expiry dates on canned food, sauces, baking ingredients, and dry goods. Avoid paying to move heavy food that you are unlikely to use.
Plan meals around pantry and freezer items during the final week. This reduces waste and makes the refrigerator easier to empty.
Donate unopened, in-date food where local donation rules allow it.
Step 2: Clean Cupboards and Drawers as You Empty Them
Do not wait until the entire kitchen is packed before cleaning the cupboards. Clean each area as soon as it becomes empty.
Follow this process:
- Remove all items.
- Vacuum or brush away crumbs.
- Wipe shelves and walls with a mild cleaner.
- Clean corners, hinges, handles, and shelf edges.
- Remove sticky residue.
- Dry the area completely.
- Leave the cupboard open for a short time to air.
Pay close attention to cupboards that store oil, spices, flour, sugar, and snacks. These areas often contain spills or fine crumbs that can attract pests.
For drawers, remove the cutlery tray and wash it separately. Vacuum beneath it before wiping the drawer.
Clean the cupboard under the sink last. Check for leaking bottles, damp cloths, old sponges, and partly used cleaning products. Do not pack chemicals that are leaking, unlabelled, or restricted by your mover.
Step 3: Degrease Kitchen Appliances Before Moving
Grease and food residue can spread onto boxes, blankets, and other belongings. Clean appliances before they are wrapped or loaded.
Always follow the appliance manufacturer’s instructions. Do not mix cleaning products, especially bleach and ammonia-based cleaners.
Refrigerator and Freezer
Start using frozen food several days before the move.
To prepare the refrigerator:
- Remove all food.
- Throw away spoiled or leaking items.
- Unplug the appliance according to the manufacturer’s guidance.
- Allow the freezer to defrost.
- Place towels around the base to collect water.
- Remove shelves, drawers, and trays.
- Wash removable parts with warm, soapy water.
- Wipe the interior walls and door seals.
- Dry every surface completely.
- Empty and clean the drip tray if accessible.
- Leave the doors slightly open until transport.
Do not close a damp refrigerator for an extended period. Trapped moisture can cause mold and unpleasant odors.
Secure loose shelves and drawers separately. Do not place heavy items inside the refrigerator during the move.
Oven and Stovetop
Remove grease before moving the appliance.
Clean:
- Burner caps
- Grates
- Drip trays
- Control knobs
- Oven racks
- Oven door glass
- The space beneath removable burners
- The outside panels
Use a product approved for the appliance surface. Abrasive cleaners may scratch glass, stainless steel, or enamel.
If you have a gas stove, arrange for a qualified person to disconnect it where required. Do not attempt gas disconnection unless you are trained and permitted to do so.
Range Hood
Range hood filters often contain heavy grease.
Remove the filters if the design allows it. Wash them according to the manufacturer’s instructions, then dry them fully before reinstalling or packing them.
Wipe the outside of the hood and the area around the controls.
Dishwasher
Before moving a dishwasher:
- Empty it.
- Clean the filter.
- Run a cleaning cycle if time allows.
- Drain any remaining water.
- Wipe the interior.
- Dry the racks and door seals.
- Secure loose parts.
A dishwasher may hold water in its hoses or pump. Follow the manual or use a qualified technician to prepare it for transport.
Microwave
Place a microwave-safe bowl of water inside the microwave and heat it for a few minutes. The steam can loosen dried food.
Then:
- Unplug the appliance.
- Remove the glass plate and roller ring.
- Wash and dry both pieces.
- Wipe the interior.
- Clean the door and controls.
- Wrap the glass plate separately.
Never pack the glass plate loose inside the microwave.
Small Appliances
Clean and dry coffee makers, kettles, air fryers, blenders, mixers, toasters, and food processors before packing.
Remove:
- Water
- Coffee grounds
- Crumbs
- Grease
- Food residue
- Detachable blades and attachments
Place small parts in labelled bags. Keep each bag with the correct appliance.
Secure cords with reusable ties. Do not wrap cords tightly around appliances, as this can damage the cables.
Step 4: Wash Reusable Containers and Drinkware
Reusable food containers can trap grease, crumbs, moisture, and odors.
Wash:
- Plastic storage containers
- Glass containers
- Lunch boxes
- Water bottles
- Travel mugs
- Silicone food bags
- Insulated food jars
Check lids, seals, and drinking spouts for hidden residue.
Let every item air-dry completely. Do not stack or close containers while they are damp.
To pack them efficiently:
- Match each lid to its container.
- Stack smaller containers inside larger ones.
- Place lids together in a labelled bag.
- Wrap glass containers individually.
- Discard cracked containers or damaged lids.
Do not pack containers that smell strongly after washing. Odors may become worse inside a sealed moving box.
Step 5: Pack Dishes, Glasses, and Cookware Safely
Kitchen boxes can become heavy quickly. Use strong boxes and reinforce the bottom with packing tape.
Add a layer of crumpled packing paper or a folded towel to the bottom of each fragile-item box.
Plates and Bowls
Wrap each plate separately. Place plates vertically, like records, rather than stacking them flat.
Fill empty spaces with packing paper so the plates cannot shift.
Wrap bowls individually or in small groups, depending on their weight and fragility. Place paper between nested bowls.
Glassware and Mugs
Wrap each glass or mug separately.
Fill hollow spaces with packing paper. Place heavier glassware at the bottom and lighter pieces at the top.
Use box dividers for wine glasses or delicate drinkware. Do not place heavy items above fragile stems.
Pots and Pans
Clean and dry all cookware before packing.
Nest smaller pots inside larger ones. Place paper, towels, or pan protectors between pieces to prevent scratches.
Wrap glass lids separately. Pack them vertically where possible.
Knives
Never place loose knives in a box.
Use knife guards, a knife roll, or thick cardboard sleeves. Secure each cover with tape without placing tape directly on the blade.
Wrap the bundle and label it clearly:
Sharp kitchen knives—open carefully
Place knives flat inside the box, not near the top where someone may reach into them.
Cutting Boards and Baking Trays
Pack cutting boards, baking sheets, and cooling racks vertically along the side of a box. This saves space and adds support.
Make sure wooden boards are fully dry before packing.
Step 6: Pack Pantry Food Without Leaks or Pests
Move only food that is sealed, in date, and worth transporting.
Pack pantry food in small boxes because jars and cans become heavy.
Before packing:
- Tighten every lid.
- Check glass jars for cracks.
- Tape lids where appropriate.
- Place liquids in sealed plastic bags.
- Keep oils and sauces upright.
- Separate food from cleaning supplies.
- Discard leaking packages.
Avoid packing open flour, sugar, rice, cereal, or pet food in weak original packaging. Transfer them to clean, sealed containers when practical.
Check your moving company’s rules. Some movers will not transport perishable food, aerosols, flammable liquids, or certain household chemicals.
Label pantry boxes clearly so they can be unpacked early.
Step 7: Label Kitchen Boxes by Contents and Priority
“Kitchen” is not a detailed enough label.
Use labels such as:
- Kitchen—everyday dishes
- Kitchen—fragile glassware
- Kitchen—pots and pans
- Kitchen—pantry food
- Kitchen—small appliances
- Kitchen—open first
- Kitchen—sharp knives
Add the destination area where helpful, such as “upper cupboard” or “pantry.”
Mark boxes that contain fragile items on the top and at least two sides.
Numbering boxes can also help. Keep a simple list on your phone showing what each box contains.
Pack a First-Night Kitchen Essentials Box
Prepare one box for the first evening and morning in your new home.
Include:
- One plate, bowl, mug, and set of cutlery per person
- One frying pan or saucepan
- A basic cooking utensil
- A sharp knife with a guard
- A cutting board
- Dish soap
- Non-toxic hand soap
- A sponge
- A cleaning cloth
- Paper towels
- Trash bags
- Coffee or tea supplies
- Bottled water
- Simple snacks
- Pet food and bowls where needed
- Basic food storage containers
Add a kettle or coffee maker when space allows.
Keep this box with you or place it at the back of the moving vehicle so it can be unloaded first.
How to Pack a Kitchen in 48 Hours
A short deadline requires a strict order.
First 24 Hours
- Gather boxes and cleaning supplies.
- Remove expired and unwanted food.
- Pack decorative and low-use items.
- Pack extra dishes and cookware.
- Wash reusable containers.
- Clean cupboards as they become empty.
- Begin using or discarding refrigerated food.
Final 24 Hours
- Pack daily dishes, leaving only a basic set.
- Clean small appliances.
- Empty and prepare the refrigerator.
- Degrease the oven and stovetop.
- Pack pantry food.
- Prepare the essentials box.
- Wipe counters and the backsplash.
- Sweep and mop the floor.
- Complete a final cupboard and drawer check.
Do not sacrifice safety to move faster. Fragile items, knives, glass shelves, and appliance parts still need proper protection.
What Should You Leave Unpacked Until Moving Day?
Keep these items available:
- All-purpose cleaner
- Dish soap
- Non-toxic hand soap
- A sponge
- Microfiber cloths
- Paper towels
- Trash bags
- One set of dishes per person
- Basic cutlery
- One pan
- A cooking utensil
- Coffee or tea supplies
- Snacks and drinking water
- A marker and packing tape
Place them in your essentials box after the final meal.
Final Kitchen Moving Checklist
Before leaving, confirm that you have:
- Removed all food from the refrigerator and freezer
- Defrosted and dried cold appliances
- Cleaned grease from the stove, oven, and range hood
- Washed and dried reusable containers
- Cleaned every cupboard and drawer
- Protected knives and fragile items
- Sealed pantry liquids
- Labelled boxes by contents and priority
- Emptied the rubbish and recycling
- Wiped counters and splashbacks
- Cleaned behind accessible appliances
- Swept and mopped the floor
- Checked the dishwasher, oven, and microwave
- Packed a first-night essentials box
Frequently Asked Questions
Should I clean my kitchen before or after packing?
Clean each area as you empty it. This is faster than packing the whole kitchen and returning to clean every cupboard at once.
How do I keep kitchen items from smelling during a move?
Wash and dry every item before packing. Empty appliances, remove food residue, and avoid sealing damp containers or refrigerator parts inside boxes.
How should I pack kitchen knives?
Use knife guards, a knife roll, or secure cardboard sleeves. Wrap the protected knives together and label the box clearly. Never pack loose blades.
Can I move food from my refrigerator and freezer?
It depends on the travel time, temperature, and moving company rules. Use chilled containers for short trips. Discard food that cannot remain at a safe temperature.
What should I pack first in the kitchen?
Start with seasonal items, serving dishes, baking tools, extra glasses, duplicate utensils, and appliances you rarely use.
What should I pack last?
Pack everyday dishes, cleaning supplies, basic cookware, coffee equipment, snacks, and your first-night essentials last.
We hope you found this blog post, How to Clean and Pack Your Kitchen Before a Move, useful. Be sure to check out our post, The Moving Checklist For Organizing The Entire Move, for more great tips!

Have Experience in the Moving Industry? Want an Additional Income Stream? Work With All Around Moving!
All Around Moving’s Work With Us program can help you, a moving relocation consultant, receive more income. Click here to learn more.