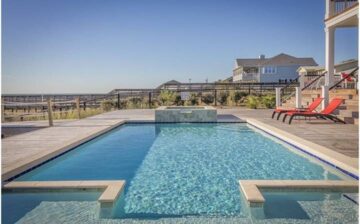
10 Simple Steps for Homeowners to Winterize Their Pool
via: pixabay
So you bought a brand new house with a pool! That’s great! Now you need to learn how to keep your pool maintained throughout the season. This means learning how to properly close your pool for the winter months to avoid algae growth or frozen pool parts. Let’s have a look at the steps you need to take to keep your pool in the best shape it can be.
Step 1) Get yourself prepared
You’ll need to get yourself a few supplies before you start to close everything up.
- Winterizing Chemicals (these can often be found together as a kit at most pool supply stores)
- A winter cover that fits the dimensions of your pool properly
- Water tubes
- A cable and winch (for an above ground pool)
- An air pillow (for an above ground pool)
- Rubber or threaded plugs
- A Gizzmo
- Air Compressor (for an inground pool)
- Protective equipment for cleaning and mixing chemicals
Step 2) Clean it up
Once you have all of your supplies ready to go, You’ll need to give your pool a good cleaning to make sure nothing is lingering in the water or filters and also make sure your water is balanced. To make sure it’s cleaned from top to bottom, you will need to brush, skim and vacuum your pool which will clear up any loose debris that is floating in the water.
Getting your water balanced requires checking not only the PH but the alkalinity, calcium hardness, and sanitizer levels. Another step in balancing is shocking your home pool a few days before you decide to close it. You do not want to add winterizing chemicals with pool shocking chemicals so it’s necessary to wait.
Step 3) Put a filter on it
The next step is to make sure your filter is ready to go for the winter. This will all depend on what kind of filter you have.
- For a DE filter, you’ll need to drain it and leave your backwash valve open.
- For a sand filter, you’ll need to remove the drain plug for the winter months and put it somewhere safe.
- For a cartridge filter, remove the cartridge and clean it thoroughly
via: pexel
Step 4) Start to break it down
The next thing you’ll need to do is to remove the return jet and skimmer baskets from the pool. Put all the parts you’re removing in the skimmer basket to keep track of them easily during the winter. You can also start to take away all the extra pool equipment that might hinder the pool’s cover. This includes removable ladders, diving boards, and floats.
If you can remove the pump and filter (not a sand filter) you can also store this along with your pool equipment so it won’t get damaged by the snow and colder temperatures in the winter months.
Step 5) Get your pump ready
If you haven’t already and you have an above-ground pool that uses a pump, you can start to disconnect and drain out both your pump and your filter. Make sure you remove all the hoses from both the pump and filter and make sure the pump has been drained by taking off the drain plugs. Unscrew everything you can to make sure it’s not holding in any water over the winter.
Step 6) Disconnect the rest
If you happen to have a heater for your pool, now is the time to disconnect it and drain it to make sure it’s free of sitting water that can become filled with bacteria. If there are any plugs on your drain, remove them and place them with the rest of the equipment that’s been removed. Make sure to keep your heater tray in place.
Step 7) Flush it out
If you have an in-ground swimming pool, you will need to flush out any water that’s sitting in the pipes to prevent breakage over the winter. You will need to flush it out in the correct area so make sure you have a bit of knowledge about how your pool works before you attempt this yourself.
You will need to blow the air into the pipes that are connected to your skimmers and the main drain to your filter system and then back into your return jets. You likely have valves that send the water to and from your filter system. Make sure you know which valves you need to turn on and which you don’t. Every pool is different so it’s a good idea to get a professional to do it the first time and ask them to show you so you can do it yourself the following year.
Step 8) Toss in a pillow
An above-ground pool will require an air pillow that will protect the sides of your pool from water expansion that might occur if the water freezes. If you don’t have an air pillow available, you can use a variety of objects like balls, tires, tubes to prevent the water from forming into a block of ice. Just install the air-filled objects or air pillow under the pool cover and you’re good to go.
Step 9) Cover it up
Once everything in the pool has been prepared and disconnected, it’s time to install your pool cover and water tubes. Water tubes are great for anyone who lives in a particularly windy area in the wintertime. Fill your water tubes until they are around 85% full with water and lay them onto your cover using the loops provided. The water tubes should do their job and keep your cover in place all winter.
Step 10) Don’t forget about it
Even though your pool is ready for winter, you should still make sure to check on it. Look around after any major storms for damage to the cover to surrounding areas and fix it if you can.
If you follow these steps, your pool will stay in shape all winter and be much easier for you to open in the summer. A well-winterized pool will have you thanking yourself in the future.
We hope you found this blog post Winterize Your Pool: 10 Simple Steps for New Homeowners, useful. Be sure to check out our post Home Swimming Pool Safety Tips for more great tips!

Have Experience in the Moving Industry? Want an Additional Income Stream? Work With All Around Moving!
Partner with us and we’ll help you profit. Click here to learn more.