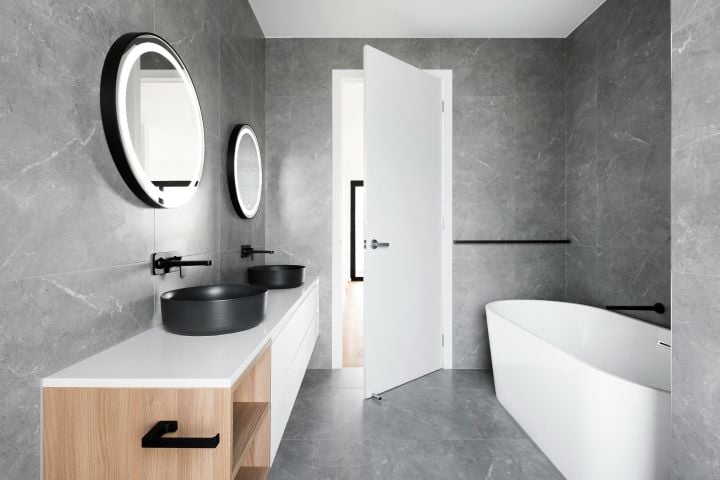
Bathroom renovation is a complex project that requires careful planning, meticulous execution, and attention to detail. Below is a more detailed step-by-step guide to help you navigate through the process effectively.
1. Initial Consultation and Planning
Define Your Vision and Goals
Begin by defining your vision for the renovated bathroom. Consider factors such as style preferences, functionality requirements, budget constraints, and timeline expectations. Determine the primary goals of the renovation, whether it’s updating outdated fixtures, improving accessibility, or enhancing aesthetic appeal.
Consultation with Bathroom Renovation Service
Engage with a reputable bathroom renovation service provider for an in-depth consultation. During this phase, discuss your vision, goals, and requirements with their design and construction teams. Share any inspirational images, floor plans, or sketches that illustrate your desired outcome.
2. Design and Layout
Conceptualization of Design
Collaborate with designers or architects to create a conceptual design for your new bathroom layout. Consider aspects like space utilization, traffic flow, storage solutions, lighting design, and plumbing configurations. Explore various design styles, color schemes, and material options to align with your vision.
Material Selection and Specification
Once the design is finalized, select materials for fixtures, fittings, flooring, countertops, cabinetry, and wall finishes. Choose high-quality materials that offer durability, water resistance, ease of maintenance, and visual appeal. Specify detailed requirements and product specifications to ensure accurate procurement and installation.
3. Demolition and Preparation
Demolition Work and Site Preparation
Commence the renovation by conducting demolition work to remove existing fixtures, walls, flooring, and plumbing components. Ensure proper disposal of demolition debris following environmental regulations. Prepare the site for structural modifications, electrical upgrades, and plumbing installations as per the new design plan.
Structural Modifications and Infrastructure Upgrades
Address any structural changes required for the new layout, such as relocating walls, installing new windows or doors, or adjusting ceiling heights. Upgrade plumbing and electrical systems to accommodate new fixtures, lighting fixtures, ventilation, and heating elements. Obtain necessary permits and approvals for structural alterations and utility upgrades.
4. Installation of Fixtures and Features
Plumbing Fixture Installation
Install new plumbing fixtures, including sinks, faucets, showers, bathtubs, toilets, and bidets. Ensure proper alignment, sealing, and connection of water supply and drainage lines. Test fixtures for functionality, water pressure, and leak prevention before finalizing installations.
Electrical System Installation
Complete electrical wiring for lighting fixtures, outlets, switches, exhaust fans, heating elements, and integrated smart technologies. Install lighting fixtures according to the lighting design plan, considering ambient, task, and accent lighting requirements. Incorporate energy-efficient solutions and safety features as per building codes.
Cabinetry, Countertops, and Shelving Installation
Mount cabinetry, vanities, storage units, and countertops based on the approved design layout. Ensure proper leveling, anchoring, and sealing of cabinetry and countertops. Install shelving units, medicine cabinets, and mirrors for functional storage and aesthetic enhancement.
5. Finishing Touches
Flooring and Wall Treatments
Lay flooring materials, such as tiles, hardwood, vinyl, or laminate, with precision and attention to detail. Apply grout, sealants, and finishes for waterproofing, durability, and visual appeal. Install wall treatments, including paint, wallpaper, tile backsplashes, or decorative panels, to complement the overall design theme.
Fixture and Accessories Installation
Complete fixture installations, such as towel bars, robe hooks, toilet paper holders, shower niches, and soap dispensers. Mount mirrors, shower doors, bath screens, and glass partitions as per design specifications. Install accessories like grab bars, shower caddies, and built-in seating for convenience and accessibility.
6. Final Inspection and Cleanup
Quality Assurance and Testing
Conduct a comprehensive inspection of all renovated components, fixtures, and systems. Test plumbing fixtures for water flow, drainage, and leak prevention. Verify electrical systems for proper wiring, grounding, and functionality. Check cabinetry, countertops, and flooring for stability, alignment, and finish quality.
Cleanup and Site Preparation
Perform thorough cleanup of the renovation site, removing debris, dust, and construction materials. Dispose of waste responsibly and recycle materials whenever possible. Prepare the bathroom for final touches, such as grout sealing, caulking, hardware installation, and final adjustments.
7. Final Touches and Handover
Grout Sealing and Caulking
Apply grout sealant to tiled surfaces to protect against moisture, stains, and mildew growth. Caulk joints, seams, and edges for waterproofing, insulation, and aesthetic enhancement. Ensure seamless transitions between different materials and surfaces.
Hardware Installation and Final Adjustments
Install hardware, such as door handles, drawer pulls, faucets, showerheads, and trim accessories. Make final adjustments to fixtures, doors, and cabinets for smooth operation, proper alignment, and aesthetic consistency. Test all systems, features, and finishes for functionality and quality assurance.
Client Walkthrough and Handover
Conduct a final walkthrough with the client to review the completed renovation and address any concerns or touch-ups. Provide instructions and guidance on maintenance, care, and usage of fixtures, finishes, and systems. Hand over the renovated bathroom to the client, ensuring satisfaction and compliance with design specifications.
Conclusion
Bathroom renovation is a detailed and intricate process that requires expertise, planning, and execution. By following this comprehensive step-by-step guide, you can achieve a successful bathroom renovation that enhances functionality, aesthetics, and comfort in your home. Collaborate with experienced professionals, beleafrenovation.ca, communicate effectively, and prioritize quality to create a stunning and functional bathroom space that meets your needs and exceeds your expectations.
We hope you found this blog post on the Ultimate Guide to Bathroom Renovation: Step-by-Step Process useful. Be sure to check out our post on Bathroom Renovation: A Worthwhile Investment for more great tips!

Have Experience in the Moving Industry? Want an Additional Income Stream? Work With All Around Moving!
Make money as a partner with our Work With Us program. Click here to learn more.